Tuesday, December 18, 2012

REDISCOVERING BORAX

I had some lovely white dish towels from the institute here at home a while back.  I decided to layer them in between the layers of biscuits that I baked here at home rather doing mighty battle with the ovens from, "you know where". Now what I had forgotten is how much fat was in those biscuits.  Those poor towels were such a mess but . .  I forgot when I washed and dried them.  Talk about nasty yellow stains.  They also developed a rancid odor, yuck!

So I brought them home again and thought about it for a week.  I noticed the box of Borax and thought It wouldn't hurt anything.  I also had a new bottle of a good degreaser(purple stuff from Sams Club but any good degreaser would probably work) to add to the mix.  Unfortunately, I didn't measure when I loaded the washer.

The Guesstimations are:
1--Enough HOT water to the small load level
2--About 1 1/2 qts. of the degreaser
3--About 2 - 3 cups of Borax.

 I agitated it for a few minutes to make sure it was all stirred up good and then let it soak for several hours.  then let it agitate for the longest cycle and put it through the extra rinse.

Everything came out very white, clean and smelling like  . .  nothing.  Now that is the true smell of  "clean"!  I had also added some real stinkers that had been waiting out in the garage including a table cloth that has been through several "war zones" trying to get some old, yellowed grease stains out of it.

Guess Grandma knew what she was doing!

* * * * I did a second load when I found some of those same nasty towels that had been kicked out of the way. Cut amounts in half and used warm water.  They still came out beautifully!


Sunday, January 22, 2012

JULIENNE POTATOES . . . Not" Funeral Potatoes"

I decided a long time ago that the infamous "Funeral Potatoes" were invented by the owners of funeral homes . .  just to keep their business booming.  With all the butter, sour cream, and cheese, it can give anyone a heart attack!  This is just as ooey, gooey and yummy as any other.

1 C. Morrison Country Gravy Mix
1 t. Lawry's seasoned salt
1-2 C. Unflavored Yogurt
2 lbs. frozen hash browns, thawed
1/2 # grated cheese1/2 medium onion, diced

1--Mix gravy mix with cool water until well blended and set aside.
2--Bring  3 c. water to a boil.  Add gravy mix slurry, blend well.  Cook until thickened.
3-- Add yogurt, seasoned salt (to taste) and blend.
4--Toss hash browns and most of the grated cheese until they are mixed up evenly.  Place in 9" X 13" baking
     dish that has been sprayed.  Add "slurry" and mix;  sprinkle left-over cheese.   Cover with foil.

Bake at 350 degrees until hot and bubbly.  Remove foil and continue baking until the cheese topping is browned slightly.

**If you would like to shave the calories some more, use low fat cheese and make sure that you have plenty of slurry.  It will melt and blend in nicely.

Saturday, January 21, 2012

My New Calling. . . . and Blessing

As a member of  The Church of Jesus Christ of Latter Day Saints, I received a calling last Fall as a service missionary in our local area.  Our university has a pretty large Institute of Religion where they have a $1 lunch each Friday for the students . . . and full-time missionaries and few other misc. staff and visitors.  It has been one of the greatest challenges/blessings I have ever experienced.  I love the "kids" (young adults) .  They are a great group of young people who want to make good choices, do good in this world and follow our Savior's example and commandments.  It makes for a lovely and loving spirit that can only lift those around them.

I have learned a lot!  With the strangest ovens I have ever had the "opportunity" to deal with (was that put tactfully enough? . .  they are a NIGHTMARE . .  ah hem) to what will please the kids, make them feel that for just a few minutes, they can enjoy the tastes and love of home and help them relax and enjoy each other's company for an afternoon and there are a couple of grandmas (Sister Hays and me) with a hug ready and waiting for whoever needs it ( a couple of gramps too).

We have had near disasters, some pretty funny experiences and some great triumphs (in spite of the ovens).  All add up to a new adventure each week.

My greatest practical lessons have been in creating yummy meals that can be done, from beginning to ready to eat in 3 - 4 hours. . .  for a crowd of anywhere from 130, last week to 170 this last week.  Never boring!

I thought I would share a lot of what I have learned on this blog while I wait to get together with my DIL so she can show me how to add tabs and organize it better.

Hope you find my adventures useful, convenient and tasty for your families.  My family has been my tolerant if not willing guinea pigs for many of the dishes I have served down there!  I will have family and group size recipes posted here.

Friday, January 20, 2012

POSSE STEW

Posse Stew             (for groups down below)

#401 Can of Pinto Beans
# 401 can of Hominy (I like to use yellow but the whole country seems to have gone white)
#401 can of Diced tomatoes
1 Dice onion
1 # ground beef, cooked
1 can of diced green chiles ( I use 1/2 can of green chiles that I dice myself)
Red chile powder or taco seasonings to taste.

**Equal amounts of beans, hominy and diced tomatoes.  I usually use beans I have cooked myself.

Dump (dumping is an important part of the technique here) all of the canned ingredients into a big pot; add seasonings and simmer while you brown the ground beef and onion until they are softened.  Add to pot and check your seasonings.  Simmer a while until the flavors are blended nicely and serve with corn bread, crackers or whatever sounds good to you.  This has always gone like hotcakes when I have served it!

When you have a big crowd, there will always be some that want it hot as hades.  I put a bottle of Tabasco or Frank's Hot Sauce where they can add it to their bowls.  Yesterday we also had a bowl of HOT diced green chiles that had been given to us that we knew we would never eat (wimps here).  The kids liked both.

Tonight I will post the amounts I used for about 75 people and the chicken soup as well.

Posse Stew for a Crowd---

This should make about 14 quarts of Posse Stew and serve about 28 - 30 people.

I just realized that this would be a little hard since I was using left-over beans and beef from our stake BBQ in November.  So I will figure it as well as I can.

# Ten cans hold 3 1/2 quarts of food.  Did you know that?  We always call them gallon . .  NOT!  So to fill young people, we get the big paper bowls that hold "20 oz." .  That will give you a little head room with a good sized bowl of soup or chile.  Keeping that in mind, here is how I start out the Posse Stew:

1 - #10 can of pinto beans
1 - #10 can of hominy
1 - #10 can of diced tomatoes
1/2 - # 10 can of diced green chiles  (at home I often chop up a #401 can of "Hatch whole chiles" that come
         in pairs at Costco)
2 # ground beef
1-2 diced large onions

Serve with cornbread, biscuits, grated cheese crackers . .  it's all good.

This should make about 14 quarts of Posse Stew and serve about 28 - 30 people.

Friday, May 27, 2011

Getting the Heat Out of The Kitchen!!!

It is that time of year again, I am NOT going to do much cooking in my kitchen.  It is in the exact middle of my house and even with the new stove hood, which vent the heat out, I don't want to do much cooking in there.

Today, the family is gathering for an early Memorial Week End BBQ.  We will of course have the standards, hot dogs and hamburgers, but I have secret surprise cooking for them.  BBQ Pork Spare Ribs ala Wonder Box.  I am about to put them on (9:30 am) and they should be absolutely falling off the bones by dinner time.  All I will have to run the stove is about 20-25 minutes and the rest will be done out on the patio, just o get the box out of the way.  Think of all the energy I will be saving.  Time will be saved to since I won't have to check them once they ore cooking.

I already have baked beans in one crock pot and the funereal potatoes will be going into another one as soon as the ribs are tucked into the Wonder Box.  The men can be manly and "man" the grill . . . not for me thank you very much!!

UPDATE:  As usual, I checked the temperature of the meat as soon as I opened the pot and bag.  They were still at 157 degrees, great !


The ribs turned out wonderful, in most respects, juicy and tender.  There was a little hole in the bottom of the bag, so some of the BBQ sauce leaked out and some of the water leaked in.  


Lesson learned:  Check for leaks in the baking bag!

Friday, May 6, 2011

Summer Weather and All of It's Fun is Here . . . .Early!

As I have been working  my little tushi off to get my belated garden in, I have been watching the news a lot.   In case you have missed it,  a lot of people have been losing their power, water  . .  and they are the lucky ones in some areas!  This was driven home when I read the following post on "Safely Gathered In". Click HERE.

Monday, May 2, 2011

Texas Sheet Cake, to Thrill a 5-Year Old


Years ago, I learned to decorate cakes and thought it would be so wonderful to do special cakes for my kids as they grew up.  My hot old hands (even when I was young) would melt the icing in those bags so quickly, so I had to resorts to other methods.  Wish I had figured out how to use this "pouring"  candy frosting a long time ago. 

TODAY'S PREPAREDNESS LESSON:

Learn to roll with the punches, make it easy on yourself!  Creating special memories can be fun and easy!!Now I can just have the kids guide me and give them what they want.  It is often no where near as grandiose as we imagine.  I have adopted the motto, " don't impress the adults, thrill the kids,"  I had more than one question about how I made this cake.  Smart moms, smarter than I was!!  


Texas Sheet Cake  and Candy Frosting  click HERE  This will also show the cake I made last year for Garrett's 4th birthday.  

So anyhoo, here is the low down on the birthday of our big 5 year old boy!!


The cake started with talking about fractions with Gabriel ( 6 year old brother).  This is how his mother and my other kids were also introduced to fractions. . .  cooking.  The idea got mixed reviews from the kids, but Gabriel thought it was OK since he got to help me make the cake . . after which, I taught him the "fine art of scraping the bowl". That of course is a VERY important part of baking.


Next night, Garrett (birthday boy) got to help me frost the TX Sheet Cake.  He made the same mistake that I tend to do, and went over the same spot too many times.  Poor little guy looked up at me with such great big eyes full of panic.  he was so sure that he had ruined his own cake.  It was OK when I told him that we could put the requested island full of dinosaurs over it.  The light blue frosting was poured over a coat of white frosting that was blocking out some of the brown from chocolate showing through.  Garrett loved the spray that gave the "water" a little more dimension.  Garrett was shown the fine art of scraping the pan after making the candy frosting for the cake . .  also a VERY important part of baking.

The island needed to have some height so that there could be the requested water fall on it, so I made the second cake in various pans and bowls.  It was supposed to be light chocolate so that would look better under the "sand".


We made a second batch of the candy frosting, tinted it a bit to make it tan colored and poured it over the "island".  Garrett was getting pretty excited at this point as he could see his dream cake coming together.  It was his job to place all of the fishes in the water and dinosaurs on the island.  I did have him leave some space on that one area for a surprise shark that Gabriel had helped me find.  It was BIG!! and had great teeth.

Garrett is talking about volcanoes a lot these days, so along with the shark, and water fall, I added some hot lava . . .  he seemed excited when he first saw it over at the park, just before his party and then all of a sudden, got upset and wanted it "off right now"!  It was just too late and then the guests started to arrive . .  what to do, what to do.

He finally accepted and went to play with the rest of the kids.  Whew!!  You really can't tell, but there is a little Tiki hut on the backside of the volcano.  I had hoped to put the five little candles at the top like fire coming out of the volcano, but he wanted to have the "five" candle up there.  Oh well, it was his cake.

Thursday, April 21, 2011

Tire Gardening . . The Next Chapter

I have realized that this is not for the faint of heart.  Cutting the side walls was hard work, even with a big supply of new, sharp blades and using the saws all.  By taking my time and pacing myself.  If I sound a little wimpy, I am 61, had health (breathing, asthma and other issues) since 2006.  Though that has left me a "wimp" compared with what I used to do, I am thrilled to be able to physically accomplish what I have done this Spring.

It is dark, but in the morning I will take more pictures and talk about:
  • Where to find free tires.
  • Figuring the amount of soil that you will need.
  • Placement
  • What to plant in them
  • Some advantages of using them.
  • Using them for Winter Gardening
Because it is a little late for planting here, I have just purchased plants instead of starting with seeds, a little expensive, but after shopping around, I hope that I will be able to make it pay off in the long run!

Monday, April 18, 2011

New Category . . . . Thriftiness

I am addicted to weddings and bridal or baby showers.  I love to help at the celebrations surrounding these happy occasions.  One reason I help with these is that it should be a wonderful happy time for those involved in them.  I have offered my assistance many times to help out friends and it evolved from there.

I now have many materials to help create a base for decorating and fluffing.  Arches, tulle, lights, greenery, table cloths, serving dishes, you name it.  I am working on boxes to give lift to the serving tables for interest and create ease in self serving.

Why am I bringing this up?  Have you ever watched the shows on "reality" TV that deal with weddings?  It's insane!  Now is the time to think out of the box if you are involved with one of these wonderful occasions in your life.

If you have or as you attend other weddings, start making calls if there were things that you could use in your event!  When I go to a wedding, I am always looking for new ideas and what colors they have.

As you may be shopping, look at the "outlet" stores for serving and decorating pieces.  Most of my crystal trays and bowls have come from Ross, Marshal's thrift stores.  My goblets came from Costco, a real "splurge"  for me.  But they were a gonga deal or I wouldn't have bought them.

My arches were bought for half price after Christmas when my daughter got engaged that month.  They have been used in so many weddings and parties that I have lost count.

I need to go out and work before it gets too hot.  Can you believe I am saying that in April?   I am, we have been over 90 degrees several time and even in the 80's is hot to me  ;- ]

Out to my tire cutting . . . !

Tuesday, April 12, 2011

TIRE GARDENING , , FIGURING IT OUT!

Today, as I was struggling with my little tools, OK, not so little, I realized that some people might not always know what I am taking about.  So I have some more little pointers to share tonight
Tire with steel belted side wall.

First I will share a few pictures of the tools that have worked for me.   Since the steel belts ate up the blade on the jig saw, I drilled several holes in it.


JIG SAW


To join them and make slot long enough for the saws-all  blade to fit through, I cut through them with the jig saw.

When I fit the saws-all blade through the slot, I had to ease it in to keep from bending it.  A bent blade makes it hard to control the piece being cut.


I don't know if they all have adjustable handles, but his one does.  I have always used it with the handle bent down, but when I straightened it today, I could put more pressure against it and cut through the tire faster.  I finally figured out how to keep the plate (that the blade goes through)  resting on the tire to avoid vibration.  Makes it so much easier to get the job done!


Next I turned it around so that instead of pulling it so that it was coming toward me, I was pushing against it.  I could line it up and cut straighter and cut much faster!  I was able to remove the side wall from a big tire, truck sized, in less than 10 minutes.

I hope that these tips will be a help to those who want to garden and have limited resources.

In a couple of days I will be picking up a load of good garden mix.  It will be 1/3 native soil, 1/3 manure and 1/3 sand.  I will also be picking up some good quality compost to mix in.

More soon, I hope!


Sunday, April 10, 2011

Can You Sleep At Night?


I ran this story about two years ago, but with all of the natural and man made troubles through out the world, I feel it is worth asking ourselves this question again. 


A farmer needed an extra hand to help on his farm. One young man came to interview for the job. "What are your qualifications?" the farmer asked. "I can sleep when the wind blows," the young man said. This simple reply confused the farmer, but he was desperate for help and the young man was hired.


The young man was a diligent worker through the harvest season, but the farmer still questioned his answer.

Autumn ended and the first cold storm of winter came late one night. The farmer panicked as the winds began to blow. Calling the young man for help, the farmer grabbed his coat and pulled heavy boots on his feet. He was disappointed to find the young man asleep in bed at a time like this. Grudgingly he ventured out alone planning to shuffle all of the animals in the barn and then fix that last hole in the roof. He mumbled about the young man sleeping and was sure all the farm equipment was left standing in the field, collecting rust from the snow.

However, when the farmer reached the barn all the animals were tucked safely inside. In fact, clean hay had already been set out for the new day. Not a single hole could be found in the roof, and the tractor was parked perfectly in the shed.

"Who could have done it?" the farmer wondered. And then, he realized what the young man's answer meant, 
"I can sleep when the wind blows."

Saturday, April 9, 2011

Tire Gardening . . . More Adventures!


MY GOAL !
I was delighted yesterday to see how easy it was to cut the side wall from a tire.  It only took about 5 minutes per tire . . . THEN I went for one of the bigger tires.  Did you know that in the big ole' tires, the steel belt goes all the way form the tread to the bead that is against the actual rim?  Not funny!

I noticed a difference when I drill the pilot hole to put the jig saw blade in.  The blade wouldn't fit, so I drilled a second one on the edge and made it longer.  Then I started to saw away, or so I thought.  I had to push that saw a lot harder and it went very slow.  Then the smoke started  sneaking out of where I was trying to cut . . . . . aw nice, burnt rubber .  . every one's favorite . . .  P-U!

I finally took the blade out, grabbed it with the fingers of my other hand . . . OUCH . .  that baby was HOT!  The good news is that I now realize that my numb finger has more feeling in it than I thought.  I took a look and saw little sparkly things in the rubber of where I had managed to force the blade through.  Ah ha moment here.  The steel belt went farther than I had realized.  So it was time to drill lots of exploratory holes.  They all did the same thing, in all of the tires that I have left to cut.

This morning I took my third little grandson and he helped me pick out some saws all blade that are hardened to cut through metal and just as soon as it stops raining out there, I will go and try one of those .. .  or see if I can sweet talk my main squeeze into doing it.  It is only about 63 degrees here today, after having several weeks of over 80 and even 2-3 days of going over 90 degrees.  All of us desert rats are going into a little shock here.

In the meantime, here are some pics of my first, successful, attempts at this new gardening adventures!


I just used an ordinary 1/4" drill bit to make the hole for the jig saw blade.


Using the blade with the larger teeth for metal cutting went around an average sized tire for a passenger car in about 5 minutes.  There was no belt in the side wall.


Wah La!!  Ready to be cleaned up and filled with a good garden mix!


The next tire was a large pick up tire with a steel belt up the entire sidewall.  When you drill the pilot hole in the side wall, it will kind of catch as it goes through the steel belt.  You will hear the wire break.  If you hear that, see if you know someone with a saws all if you don't have one.  I found the hardened blades made for metal at Home Depot.  I have also seen them at Lowe's, so they shouldn't be too hard to find.  Using those in the saws all, it took about 10 minutes to cut the side wall out.  the saws all takes more hand strength to hang on to but don't let that scare you gals off from getting this done if you need to.

The metal cutting blade for the jig saw didn't have the hardened blade and the teeth were worn almost all the way off by the time I had cut about 12"-14"in that steel belt.  Lesson learned.  Good blades pay for themselves.

Tomorrow is Sunday, so this project will be completed on Monday.  "See" you then!!

Thursday, April 7, 2011

FIRST TIRE GARDEN IN THE FAMILY

My kids beat me to the draw.  I am proud of them for doing that.

I understand that it was pretty hard to cut straight with all the vibrating from the saws-all.  Though it looks pretty good to me!  


Mine isn't working right now, so I will be using a jig saw. . . . or maybe my husband will be able to get the saws-all going . . . and he, like my son, has stronger hands so will be able to help me . . . . I hope?

Wednesday, April 6, 2011

Economy . . . Ideas on How to Survive It

My Piggy Bank after I filled my gas tank
I have been thinking a lot about the economy since I was filling my gas tank the other day at  $3.45 / gallon of gas.  I know, many others are paying much more already, but it is sending me into a little bit of shock.   I used to fill my tank for that amount!

I was in college during the "Energy Crises" of the 70's.  I had my suspicions during the holidays.  I spent each day trying to fill my mother's tank while she drove the other car so she wouldn't have to.  Got lots of needlework and reading done over that Christmas Break.  When I got home, my roommate from Canada told me about all the reports up there showing all of our harbors clogged with oil barges that no one would unload, so I knew I was right.

Well, I now more than suspect that we are being manipulated again, for the good of only "Heaven know who".

My daughter's fave story
when she was little.. because it
reminded her of me
I do NOT believe in scare tactics.  I feel they are counter productive and even harmful.  I do believe in using good sense and taking action however.

So I am working my saggy old bottom (oops, too much info, sorry) to the bone doing what I have been talking to death for several years.  I will be gathering more ideas and sharing them as I go along.

It is time to use ALL of our resources to build a way to be as self sufficient as possible.  
  • Use our imaginations.  
  • Pray for guidance of how to best use your resource.  YES, I did say pray.  I have found many answers to dilemmas through prayer.  If you are a meditater, meditate.  What ever way you choose, use it.
  • Talk to the funny old geezer up the street from you.  Ask what people did in the depression . . .  you either will find it pretty depressing or pretty inspiring.  If they just depress you, be polite and find someone who had an imagination.  My poor father had such a tale of woe, my father-in-law became a wonderful gardener.  Guess who actually went hungry at that time.  You decide what who you want to be like.
  • Look at your finances. I mean to really LOOK.  Go through it & ask your self,  "Do I really need that?",   everything that doesn't sustain life and keep a roof over your head.  Not make it prettier roof, just one that gives you shelter and a refuge from the outside world.
  • If you just HAVE to go to Disneyland this year, hope you enjoy it. . .  as you are going to the store and grind your teeth over the price for the rest of the year.
  • Think of fun things to do as a family, at home or near by.
Have I turned you completely off to my ideas? Hope not. I have lived on such meager means and survived them, without incurring any debt.  We have great memories ( now they are great) and we did't have to take nearly as long to recover after financial reversals.

On Friday I will be posting the pictures of our tire gardens.  They will show how to cut the sides out, fill them with proper garden soil, all the how's and why's I can find and share with you!

Other grow boxes have been put in as well that I will share with you.  Amazing what can be scrounged.  

Just think of it as recycling!

Wednesday, January 5, 2011

NEW YEAR, NEW BEGINNING

  • I do NOT make New Year's Resolutions.  I have found that I am normal and make unrealistic goals, too many.  That is the way to set a person up for total and complete failure and then they can find all time lows when they "beat" themselves up for "failing".


  • I doubt that I am the only one who has been doing a little extra (OK, tons!) cleaning with the intention of setting my house in order, literally and "biblically".    Something about taking down holiday decorations just makes a soul want clean and clutter free!


  • I made the mistake of accumulating too much food storage too quickly and lost my living room for about three years.  I had been using it as a kind of warehouse while refurbishing other rooms, one at a time. It was just the room we all walked through to get to the rest of the house  ;-D 
  • To make things worse, I stacked bulk food storage in one, then two back corners behind the stacks of furniture, etc.  I was gathering extra to help each of my children's families get started.  I jumped into all of this without a good plan, just felt like it was important to gather food while my husband's income would support it.  We felt sure that leaner times were coming.   It was good to gather the food, let me make that clear,  I just needed a better and more complete plan.  Time proved we right about the net take home pay. We are grateful for the guidance we were given and that we felt enough urgency to heed it.


Loooong story not quite so long, I had 4 mice get into the house when the weather turned cold, they had a hay day so I lost some of the foods that had not been stored away, had such chaos surrounding me that it was almost paralyzing, and just lost control of pretty much everything.


  1. All of the foods have been packaged for long term preservation and now I am inventorying, and creating a chart to track it's use and replacement and creating a little more storing capability that is out of the way but has easy access.
  2. I will be sharing all of this as I go along.  Some will be by reposting old posts, by sharing links to great information and by new posts.
  3. Due to the anticipated in reduction in my husband's reduced net take home pay and easier access,  we are using our storage more.  I plan to share new ideas as I come up with them or will share the links to other sites when I find ideas that help me.  

Tuesday, November 23, 2010

Cheating . . . .. Reposting as I Reorganize.

Life has been just too hectic!  I have been trying to reorganize and get back to posting, even have a slew of pictures . . . some of which are in the camera that has been missing for a couple of months now.  Hoping my almost two year old grandson didn't toss it into the trash when I wasn't looking . . . his favorite past time lately.  If he did, I guess it will be a big lesson learned.

Cynthia Layne Photography:
http://www.facebook.com/profile.php?id=1535885607&v=photos
In the middle of all this, my daughter had a double surprise. No not twins.  A little one snuck in on them about 6 months earlier than they had planned (no one wants to be PG in southern AZ in the summer)  and after 3 little boys, they had a girl.  

After some big scares and major surgery, our little miracle (doctor's words) is home and doing well.  Life is not exactly back to normal, but we are grateful for what we have!!  
Pic taken 3 days before our tiny miss landed in the NICU.  
So as I am going through to start our family Thanksgiving dinner, I will bring the recipes up to the top to share them.

These are all made from my pantry to keep the $$ down and nothing has the evil little substances that set my grand kids on their ears and Nanny/Papa's nerves on edge  . . . . .

Cornbread Dressing or Stuffing
OK . . . . I know this is ridiculously late, but hopefully it will be helpful sometime during the holiday season. I made my own dressing/stuffing this year. Not by buying the mix at the store and adding the broth, eggs, and other goodies, I made it all from scratch. OK I cheated one time. I had some baguette loaves in the freezer and cut some of those up to for the bread in my dressing. I did make my own cornbread with the seasonings, etc. in it. Had to chase my hubby off a couple of times while it was drying out in the oven, so it must have been pretty tasty. OK I
confess, it snitched too, it was tasty!

1. First I made regular cornbread with some 2. Added flavors. I also added a couple of teaspoons of chicken broth powder. Since that is salty, I eliminated the salt in this batch.  I had to look poultry seasoning on the internet because I was out of it. It is mainly sage with marjoram, thyme and a dash of pepper and cloves. I skipped the cloves. 3. To tell if your cornbread is done or not, check to see if it has pulled away from the sides of the pan slightly. It should also have the cracks that you see here. This is a double batch spread out in a cookie sheet to dry more quickly for making the dressing.


4. Break the cornbread and set back into the warm oven let it dry out. You can cut or break it into what ever size you want for your dressing. I guess I did it this way because that is how my dad always did it. Next time I will just let it cool and then dice it up. 5. I used some left over baguettes for the bread. Cut or break it up as you did the cornbread. 6. Now for the really tasty stuff. Dice onions and celery, saute in butter or I used olive oil.

This year I also added some scrambled some sausage and chopped some craisins (dried cranberries) at my daughter's request. They did add some great flavor. I mixed all of this together, covered it tightly, put in the back of the fridge a couple of days before Thanksgiving. On the big day, I just had to beat a couple of eggs, add the chicken and turkey broth and toss it into the oven for half an hour. Great little time saver!

Wednesday, September 1, 2010

HELP! I'm a Ditzy Old Lady . . . With Good Intentions!!

I don't know why, but I am having the hardest time getting pictures and text organized in my posts right now.

I am working on several posts that keep getting jumbled.  As soon as I figure things out there will be more.

I am also working on a site that will be more organized and easier to find what might be of interest to you.

Please hang in there, it should get better soon and I am trying lots of new ideas and ways to used food storage.

I am also needing to drop the last 30 lbs. so that  I can faze out some to the too many medications that I take every day.  As I de-fat and health-itize my favorite foods, I will be sharing those ideas with you.  Using food storage of course.

Tuesday, July 27, 2010

Sweet & Sour Pineapple Chicken Camping Style

First a disclaimer:  You can make this in a casserole at home if you want.  It turns out just as yummy!

If you would like to refer back to the original recipe where I got this idea, you can click HERE.

Now for the real thing!


SWEET & SOUR CHICKEN  ala FOILIE

Rice--Steam enough to give each person about 1/2 c. each serving.  Minute rice is great if you are out in the wilds!  If you want to be safe from burning, line the bottom with cabbage leaves before the rice layer. 

Chicken--I have used raw, canned and left over  (can you tell that I love this stuff?).  They all work.    Plan on 3 - 4 oz. per person.

Veggies -- Anything goes!  Here are some examples of what I have used.
  • Carrots, slivered
  • Celery, chopped
  • Zucchini or Yellow Squash, diced or sliced
  • Onions, diced
  • Mushrooms, sliced
  • Broccoli, chopped
  • Cauliflower, chopped
  • Green bean, chopped
  • Cabbage, sliced
  • Sweet peppers
  • Just about anything botanical ?  Make it gorgeous dahling, if it's pleasing to the eye, it tastes better!
  • Pineapple-- chunks or tidbits are fine, actually I cut the chunks down to tidbit size.  Save the juice!!
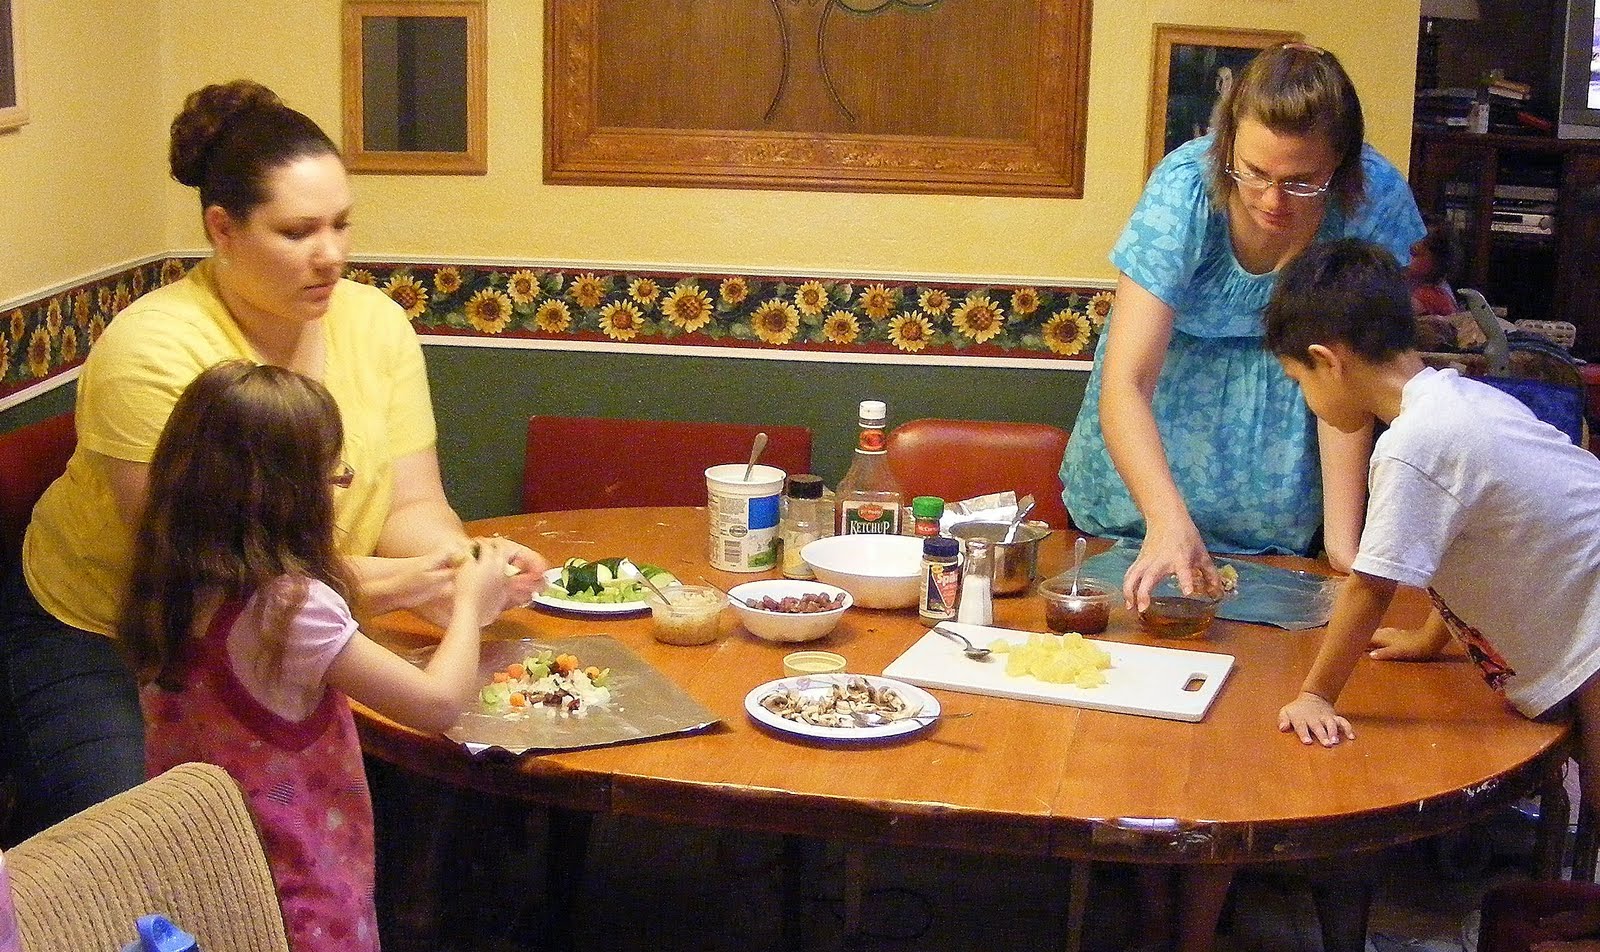
It's easiest to have all these all chopped and ready to go.  I set them all out in containers and let each person "build" their own foilie.  Even the little munchkins can have quite an opinion.

Scatter the chicken around through the veggies to distribute the flavor.  Now add the pineapple and scatter it about . . . ready for the sauce??  Yum!

I make the sauce out of:

  • 1 c. --Pineapple juice, add water to make it come to about 1/2 c. per foilie
  • 1 T. --Apple cider vinegar,  white or rice vinegar is also OK.
  • 1 T. --Sugar
  •  Tiny pinch --Ginger per cup of sauce,  powdered if you are camping
  • Good squirt --Catsup, not really authentic, but it's good mind you, good (from the great book, Guerrilla Wife, ever read it?).
  • Soy sauce, a good dash per cup of sauce or according to taste.
  • Corn starch, 1 t. per cup of sauce
  • Salt, if you want more salty without so much soy sauce.
Now for the "procedure".  Grab a cup to the side.  Carefully some of the juice into the cup.  Notice I didn't say how much?  This is not an exact recipe here.  It all depends on what you like and how much there is left to be distributed amongst all the diners.  Making it all in one batch might be the easiest.  So grab a bowl . . . . 

Put in the juice, vinegar, sugar (sugar and vinegar should be equal amounts) , ginger, catsup, and soy sauce into a bowl.  Mix them up good stir.  Add the corn starch and stir again.  Scoop half a cup in each foilie. 


That night, I warmed the sauce up in the microwave, stirring it every minute so to thicken it.  I have made it out in the wilds and just put it over the food so that it would  thicken as it cooked.  Worked fine.  
I tried to get pictures that would show how I brought the sides of the foil up to contain the sauce until I wrapped the dinner.  This is actually a large one for my hubby and me.   I covered the top with a second piece of foil and then folded all the sides like I usually do the top and sides.


Cook it on coals as you usually would.  Being so large, I cooked it for 35 - 45 minutes on moderately hot coals.  Who could resist this?


Believe It or Not!

Believe it or not, I have been busy trying new ideas with my food storage and cooking outside.   I have also been making bread and treats.  I have even been taking pictures!  Left is a giant foilie of the sweet and sour chicken.


I have also fallen in love with making this Artisan Bread.  I am trying to figure how to make several smaller ones for bread bowls.  Each baking dish needs a lid.

It has been a busy time with getting ready for another school year of baby sitting and just cleaning out thirty two years of accumulating marriage  junk  . . .  Let me make it clear, I am getting rid of the junk, not the husband!

I am finding it hard to organize everything so that I can get to it to rotate through using my food stuffs on a regular basis.

I hope to start posting all of these tonight . . . after the grand sons come over to paint and make some wooden toys.

Friday, July 16, 2010

What Not To Do?

I love blogs, you can make a total fool of yourself and who would know if they see you on the street.  I made some of the one hour bread last night.  Hubby came home and I rushed it so that I could get to bed, it was 11:00 pm and I was bushed.  Aren't a great "little" wife (not)?

Here are the pictures, such as they are.  I did try making it using some non-soy ingredients since my grand son comes over a lot and can't have the soy.  Today, I am going to go ahead and make it from original recipe.  I have several issues to correct, as you will see.  I am sharing these with you to save you the problems :-]


Here is the recipe with the experimental ingredients in blue.  I did cut the whole thing in half until I have it coming out right and soy-free.


Pantry Secrets Bread


  • 10 ½ cups bread flour or whole-wheat flour (or combination) ( I used white & half whole wheat)
  • ½ cup sugar
  • 1 Tablespoon Salt
  • 3 rounded Tablespoons SAF Instant Yeast
  • 3 Tablespoons soy lecithin (or 2 1/2 Tab. dough enhancer or both) (1/4 c. oil , 1 1/2 T. vinegar & 1/4 c. gluten flour)
  • 4 cups HOT tap water (or 3 cups hot water and 1 cup applesauce)


Mix dry ingredients (and dough enhancer if using).  Add lecithin directly into 3 tablespoon indentations in the flour and water.  Mix for one minute and check for consistency.  If dough is too dry or lumps to one side, add more water.  If dough is too moist, add a little flour.  Mix for 5 minutes for white bread, 10 minutes for wheat bread.  It will eventually clean the sides of the bowl.  Dough will be sticky.  Don’t add any more water or flour after it has finished mixing.


Preheat oven to 350 degrees.  Spray counter and bread pans with cooking spray.  Cut dough into 4.  Shape loaves and cover with a dish towel.  Let rise 20-25 minutes without touching or moving the dough.  Bake for 25 minutes.  If using a convection oven, bake 14 minutes.  Immediately remove  from pans to cool.

1.  I let the machine knead the dough for 5 minutes and it wasn't as smooth as it usually is so I gave it another couple of minutes, it didn't help.  2.  Pour a small amount of oil on the counter.   3.  Spread it out for molding the dough.


4.  Form the dough into a smooth ball by kneading a few times by hand.  Let it rest for a minute or two.  5.  Cut the dough into equal portions.  Remember that I cut the recipe in half so I only have two loaves worth.  
6.  Work the dough into a smooth roll and pinch the bottom good to make sure it holds smooth while baking.  


7.  Put the dough upside down into the well oiled pan  to coat the top with oil and them flip.  8.  Let it rise in pans with towel over to keep the top from drying out.  If it is day time (or even night in southern AZ) put it outside and it'll rise like crazy for you!  9.  Bake for 25 minutes at 350 degrees.  My favorite way to cool bread is to place it inside of a brown paper bag on top of a cooling rack.  When it is pretty cool go ahead and put it into plastic bags.

I will make another batch exactly as the recipe says today and share that with you.  So far I am not having the best luck, but Angela's was wonderful, so I know it is me, not the recipe.

LESSON LEARNED:  Try out new recipes before you are depending on the results.  I usually make good bread!  This is also why it is so important to learn to make bread before you need to.  It does usually take a little practice so it would be great to be a good bread maker before you are dependent on it!!

SNEAK PREVIEW:  This is the Artisan Bread recipe that Angela gave me at the same time as the Whole Wheat Bread.  It turned out so good last week end that I doubled this batch!  Pictures and results later today.  It needs to "stew" for a few more hours!